Web Interface Instructions
The ZuluIDE's Audio and Pi Pico Shield (available as an add-on at time of purchase or separately here) adds several capabilities to the ZuluIDE. In addition to Redbook CD audio playback, however, it also allows you to add a Raspberry Pi Pico W to the board to enable a control interface via HTTP, allowing you to swap disc images in and out on systems that don't natively support operating-system level eject and close operations like MacOS does.
Preparation and Setup
When you receive your ZuluIDE and the shield, it will come populated with all of the parts necessary for the audio-only side of the board needed to function. You will need to add the Pi Pico W to the board. Remove the shield from the ZuluIDE first, and then follow the steps below.
You'll need the following items:
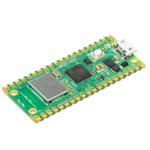
|
Raspberry Pi Pico W or Pico 2 W
(with or without headers) |
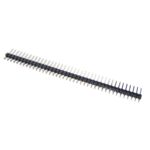
|
Male 40-pin header strip
(optional) |
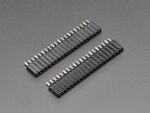
|
2x Female 20-pin header strips
(also optional) |
The headers aren't strictly necessary, but if you want to be able to easily remove or replace the Pico later, you'll want them.
Attaching the Pico W to the Shield Board
STEP 1
If you're using the headers, solder them down in the footprint provided for the Pico W. If not, skip to step 4.
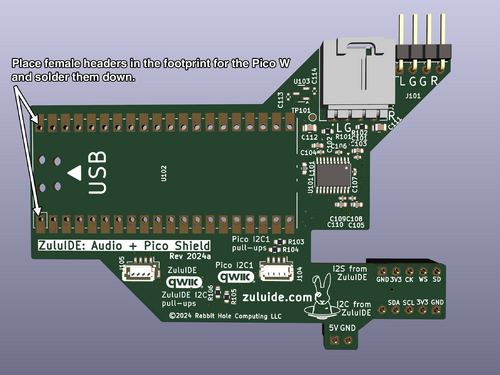
STEP 2
Cut the headers into two 20-pin lengths, and solder them to the holes on your Pico W. If your Pico W came with headers pre-installed, you can skip this step.
STEP 3
Insert the Pico W into the header sockets. You're done!
STEP 4
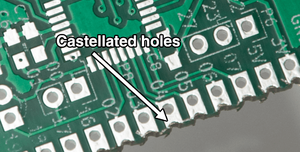
If you are not going to use headers and simply want to attach your Pico W directly to the board, you can. Place the Pico W down on the footprint provided with the USB port facing upward. To help you align the pins, you can use a cut length of header pins placed through one row of holes on the Pico W and the shield board, and solder down the opposite side. Solder directly to the castellated holes on one side (the half-holes along the edge of the board), pull your aligning header strip out of the other side of the board, and solder the other side.
Configuration and Firmware
Next, take the SD card out of your ZuluIDE. If it doesn't already have it, create a file named zuluide.ini in the root directory of the card with a text editor. Create a section in the file as follows:
[UI]
wifissid=YOUR_WIFI_NETWORK_NAME
wifipassword=YOUR_WIFI_PASSWORD
One more note: If your WiFi password contains special characters such as certain punctuation, extended character set characters, or the like, enclose your password in quotes, like this:
wifipassword="§E©RET_∏A§§WORĐ!"
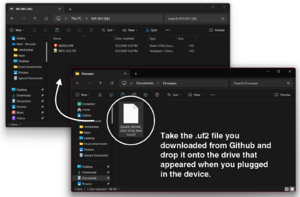
You'll also need to flash the firmware on the Pi Pico to enable the HTTP host. To do this, download the latest release of the firmware from the HTTP controller Github. Press and hold the BOOTSEL button on the Pico W, and then, using a micro-USB cable, attach it to the computer where you downloaded the .uf2 firmware file. The Pi Pico will appear as a drive on your system named RPI-RP2 and you can simply drag the firmware file you downloaded directly to the drive. When the copy completes, the Pi Pico will dismount itself from the computer and reboot. You can then disconnect the Pi Pico from your computer and reinsert the Pi Pico shield into the sockets on your ZuluIDE.
Powering Up
When you reattach the ZuluIDE to the system and turn it on, you'll notice that the light on the Pico W will eventually light stay on. This is good -- the Pico W has connected successfully to your network! But...where is it? There's a couple of ways to find out.
Check the Log File
With the shield attached and SD card reinserted, power on the ZuluIDE, either by itself by simply attaching a USB cable directly to it or by turning on the host system. When the green light on the Pi Pico comes on and stays lit, it has successfully connected to your network. Give the ZuluIDE roughly 10-15 seconds after the light on the Pi Pico comes on, and then remove the SD card and connect it directly to your computer. Open the zuluide.log file and look for a line (usually at the very end of the log) that looks like this:
[10991ms] Client IP address is: 10.0.0.196
This tells you the IP address that the Pi Pico was able to fetch via DHCP, and is the address you can put into your browser to control the ZuluIDE.
Look At Your Router
If you have the ability to configure it, looking at the configuration on your WiFi router is one way of determining what the address of the Pico W is. Usually, it will try to call itself "PicoW" as its hostname. You can try using an HTTP address of something like picow.local but if your router doesn't handle hostname translation very well (as many home routers don't) you may have to fall back to another method of determining the interface's IP address.
Scan For Its Address
Another way to find out the address of the Pico W is to use a free utility called Advanced IP Scanner to scan your local network to try and see what IPs are attached. Advanced IP Scanner can be downloaded here. This way works well if you are connected to the same WiFi network as the ZuluIDE and don't have an easy way to read the log file off the SD card itself.
To use Advanced IP Scanner, enter the range of IPs your router assigns (common candidates for home routers are 192.168.0.1-255 and 10.0.0.1-255) into the text box at the top of the window and then press the "Scan" button. The program will go through and try to determine what devices are attached to the same network you are. In the list, look for a device named "PicoW" -- if the computer icon in the left column is blue, it's connected. Record the IP address you got, and that's the IP address you'll use to configure the ZuluIDE.
Using the HTTP Interface
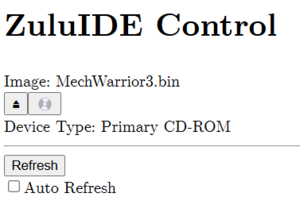
When you bring up the web interface, you'll see only a few controls. The interface shows the image you currently have loaded on the device, a button to eject the image, a button to swap disk images, and a line showing what device the ZuluIDE has registered itself as.
Under the line is a manual refresh button that will cause the Pi Pico to manually refresh the information about the loaded disk image and device type as well as an automatic refresh option that will force a refresh any time the web interface renders a page.
The ![]() button will take you to another page where you can select a new disk image. It will appear blank at first, but it will populate itself. Click the desired image in the list and then hit the
button will take you to another page where you can select a new disk image. It will appear blank at first, but it will populate itself. Click the desired image in the list and then hit the LOAD button, and it will take you back to the page shown at the right with the information changed to reflect the image you've selected.
Pressing the Eject button will simply dismount the image.
ISO Images Versus BIN/CUE Images
Most disk images will appear in the full list with their file extension shown. Entries that appear without a filename extension are directories where BIN/CUE image files reside; to use these, just select the entry in the list and all of the appropriate files will load.